If you landed on this article, you are a Shopify store owner looking for ways to boost conversions and drive more sales. Adding a pricing table to your Shopify store might be just the game-changer you need!
Navigating through different product pages to understand the features and pricing options for each item is time-consuming, and confusing, and can eventually lead to potential customers leaving your Shopify store without making a purchase.
But if you know how to add pricing table app to Shopify website, you are providing your customers with a quick and easy way to compare your products and services, saving customers’ time, catching their attention and, fingers crossed, ultimately leading to more sales for you.
Keep reading to explore the benefits of pricing tables and get a step-by-step guide on how to add pricing tables app to Shopify.
Table of Contents
What is a pricing table?
Shopify pricing table is a visually-appealing tool that allows you to create and display pricing tables on your Shopify store.

Pricing tables are used to showcase the different pricing plans or packages that you offer to your customers, and typically include information such as the main features included, the price, the benefits for customers, and any discounts or promotions that may be available.
Why are pricing tables important?
A well-designed pricing table can be a valuable tool for any Shopify store looking to increase sales and conversions. Why adding a pricing table your Shopify store is important?
- Shopify pricing table is a clear and organized way of presenting information that can help customers make a decision about which option (pricing plan or special deal) is best for their needs.
- Adding a Shopify pricing table to your Shopify store improves customer experience, as it makes their shopping experience more efficient and enjoyable.
- A pricing table can increase your store’s conversions – by helping customers easily compare the features and prices of different products or services in one place, it makes it more likely that they will find what they are looking for and make a purchase. Plus, when adding a pricing table to your Shopify store, you can provide and highlight a discount or a limited-time deal, and thus, encourage customers to make an instant purchase rather than leave the decision for later.
- Adding a pricing table to your Shopify store adds a more professional look and feel to your store. A well-designed pricing table adds a professional touch to your store, increasing customer trust and confidence in your business.
- Pricing tables can also be used to upsell and cross-sell to customers by displaying related or complementary products, highlighting additional features or benefits customers can get.d
How to add pricing table app to Shopify in 2023

Follow the steps below to quickly and effectively add a pricing table app to your Shopify store:
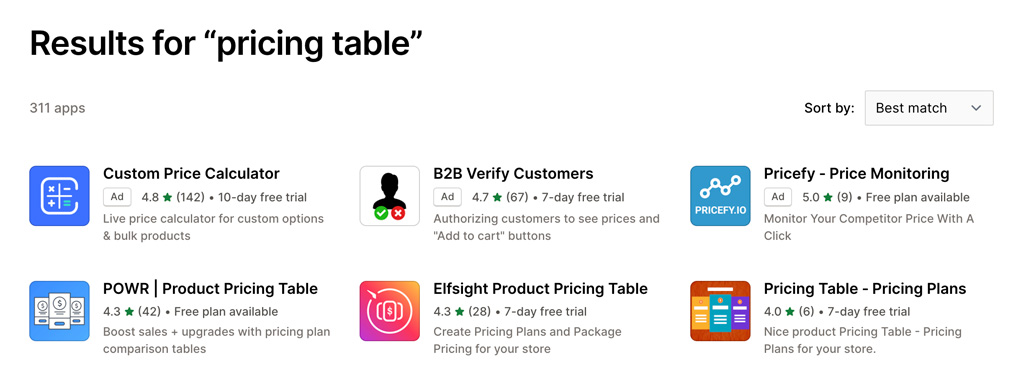
- Go to the Shopify Store. From there, search for “pricing table” or the specific pricing table app of your choice. Check out our selection of the best pricing table Shopify apps in 2023 to get recommendations on which pricing table app for Shopify to choose.
- Select the pricing table app and click on the “Add app” button to install it. You’ll then be redirected to a new web page where you can create a pricing table for Shopify store.
- Customize it to your preferences. You can choose from a variety of themes and customize colors, borders, text alignment, and other design features to match your store’s branding and overall aesthetic. Don’t forget – a well-designed pricing table can help increase your sales and boost customer satisfaction, so it’s definitely worth taking the time to work on it.
- Once you’re set, add the pricing table to your Shopify store.
- Before publishing your Shopify pricing table, test it to make sure everything is working smoothly and you like the look and feel of it. Once you’re satisfied, publish the pricing table on your Shopify store and make it available to your customers.
Tips for a Shopify pricing table
To make your pricing table more effective, here are some important tips to keep in mind when adding a pricing table to your Shopify store:
- Make your pricing table clear and easy to understand.
- Limit the number of options to three or four to avoid overwhelming customers and to help them make a decision more quickly.
- Avoid using jargon or technical terms in your pricing table and stick to clear and concise language that is easy to understand and won’t confuse your potential customers.
- Strategize the positioning of your pricing plans by placing the most valuable option in the middle, as this is where customers’ eyes are typically drawn to first.
- Incorporate visual elements such as images and colors to make your pricing table more attractive and highlight important information.
- Highlight the features included in each pricing plan, so that customers can quickly compare and understand what they are getting with each option.
- Display any exclusive discounts or promotions in your Shopify pricing table apps, as this can encourage customers to make an instant purchase and increase your store conversions.
Congratulations!
If you’re reading this, you’ve learned how to add a pricing table to your Shopify store!
And if you have followed the tips and tricks provided, you now know not only how you can add a pricing table to your Shopify store, but how to make the most out of it to boost your sales, too.
Make sure you check out our selection of the best pricing tables for Shopify and share your success story with us!


